Chocolate Birthday Cake Decoration: Easy Steps for Stunning Results
Introduction
There’s something so comforting about baking a chocolate birthday cake at home. Maybe it’s the aroma of cocoa filling the kitchen or that moment when the frosting starts to shine under the spatula. For me, the magic lies in knowing I’m creating something with my own hands for someone I love. A Chocolate Birthday Cake Decoration is more than a dessert—it’s a symbol of care, time, and a sprinkle of creativity.
I still remember the first chocolate cake I ever decorated. It was for my brother’s 12th birthday, and I went way overboard with colorful sprinkles and a slightly crooked “Happy Birthday” written in shaky icing. It wasn’t perfect—but oh, it was beautiful in its own way. 😊
Through the years, I’ve learned that cake decorating isn’t about perfection; it’s about joy. Even if your edges aren’t straight or your ganache drips unevenly, your cake carries love in every layer. In this guide, I’ll share my favorite recipe, simple techniques, and a few tricks that make decoration feel easy and even meditative. So, grab your apron, take a deep breath, and let’s create some birthday magic together. 🎂
Why This Chocolate Cake Deserves a Place in Your Heart
I’ve baked countless cakes, but this one? It’s the keeper. It’s rich, soft, and utterly comforting—like a chocolate hug on a plate. What makes this Chocolate Birthday Cake Decoration recipe so special is how it balances decadence with simplicity.
The texture is what wins me over every single time—moist, tender, and meltingly smooth, without being heavy. And that cocoa flavor? Deep, slightly bitter, perfectly rounded by the frosting’s sweetness. I like to say it’s a cake that even “non-dessert” people fall for.
What’s even better: it’s foolproof, truly. I’ve made this cake in rented kitchens, tiny student apartments, and even with borrowed tools, and it always turns out right. You don’t need to be a pro, just a bit patient and curious.
And honestly, nothing compares to seeing someone’s face light up when you bring out the cake. That proud moment is priceless. When my niece saw hers last year—covered in glossy ganache and topped with her favorite candies—she gasped, “You made this?” That’s the kind of magic worth chasing. ✨
What You’ll Need to Create This Chocolate Wonder
Before you dive in, let’s get everything ready. Having all your ingredients on hand makes the process calm and enjoyable.
🧁 For the Cake
- 1¾ cups all-purpose flour — the solid base of your masterpiece.
- 1½ cups granulated sugar — just the right sweetness.
- ¾ cup unsweetened cocoa powder — choose a good-quality one; it makes all the difference.
- 2 tsp baking soda + 1 tsp baking powder — your secret to a fluffy rise.
- ½ tsp salt — a tiny touch that enhances flavor.
- 2 large eggs — to bind and give body.
- 1 cup whole milk — keeps the crumb tender.
- ½ cup vegetable oil — ensures that perfect moistness.
- 2 tsp vanilla extract — the invisible magic.
- 1 cup boiling water — the trick that brings out intense cocoa depth.
🍫 For the Buttercream Frosting
- 1 cup unsalted butter (softened) — your creamy base.
- 3½ cups powdered sugar
- ½ cup unsweetened cocoa powder
- ¼ cup heavy cream — makes it irresistibly smooth.
- 1 tsp vanilla extract
✨ For Decoration
- Chocolate ganache drizzle — glossy, rich, and indulgent.
- Sprinkles, chocolate curls, or edible flowers — because why not have fun?
👉 Tip from experience: Always sift your cocoa and powdered sugar—it makes your frosting silky and professional-looking.
This recipe makes a two-layer 9-inch cake, perfect for 8–10 servings. Total time? About 1 hour including prep and baking—totally doable even on a busy birthday morning.
Step-by-Step: How I Bring My Chocolate Birthday Cake Decoration to Life
Decorating used to intimidate me, but trust me—it’s easier than it looks. Here’s my simple, tried-and-true method:
Step 1: Set the Scene
Preheat the oven to 175°C (350°F). Grease and flour your pans. Don’t skip this step—a cake stuck in the pan can break your heart faster than underbaked batter.
Step 2: Mix the Magic
Whisk flour, sugar, cocoa, baking soda, baking powder, and salt together. In another bowl, blend eggs, milk, oil, and vanilla. Combine both gently until smooth. Finally, stir in the boiling water—it will thin out, don’t worry! That’s the secret to the moist texture.
(Anecdote: once I forgot the water—ended up with something between a brownie and a brick. Never again 😅.)
Step 3: Bake to Perfection
Pour into your pans, bake for 30–35 minutes, and test with a toothpick—it should come out clean. Let it cool completely. Really. Warm cakes + frosting = disaster.
Step 4: Whip the Frosting
Beat the butter until pale and fluffy. Gradually add powdered sugar and cocoa. Mix in cream and vanilla. Keep going until it’s cloud-like and glossy.
Tiny trick: If your frosting feels too stiff, a spoon of warm milk brings it back to life instantly.
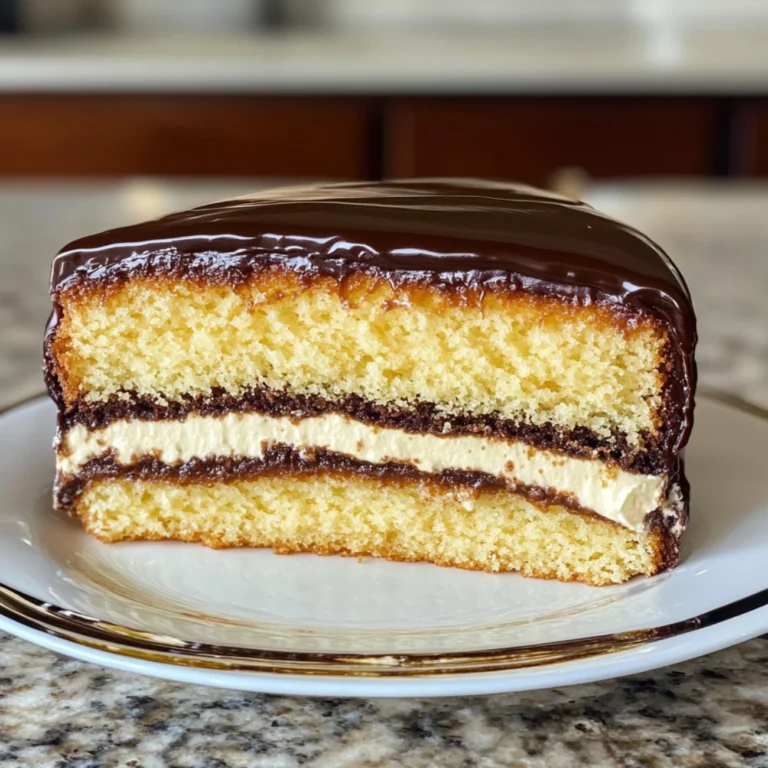
Step 5: Assemble & Decorate
Stack your first layer, spread frosting evenly, then top with the second. Add a crumb coat (thin frosting layer) and chill for 20 minutes—this locks in crumbs.
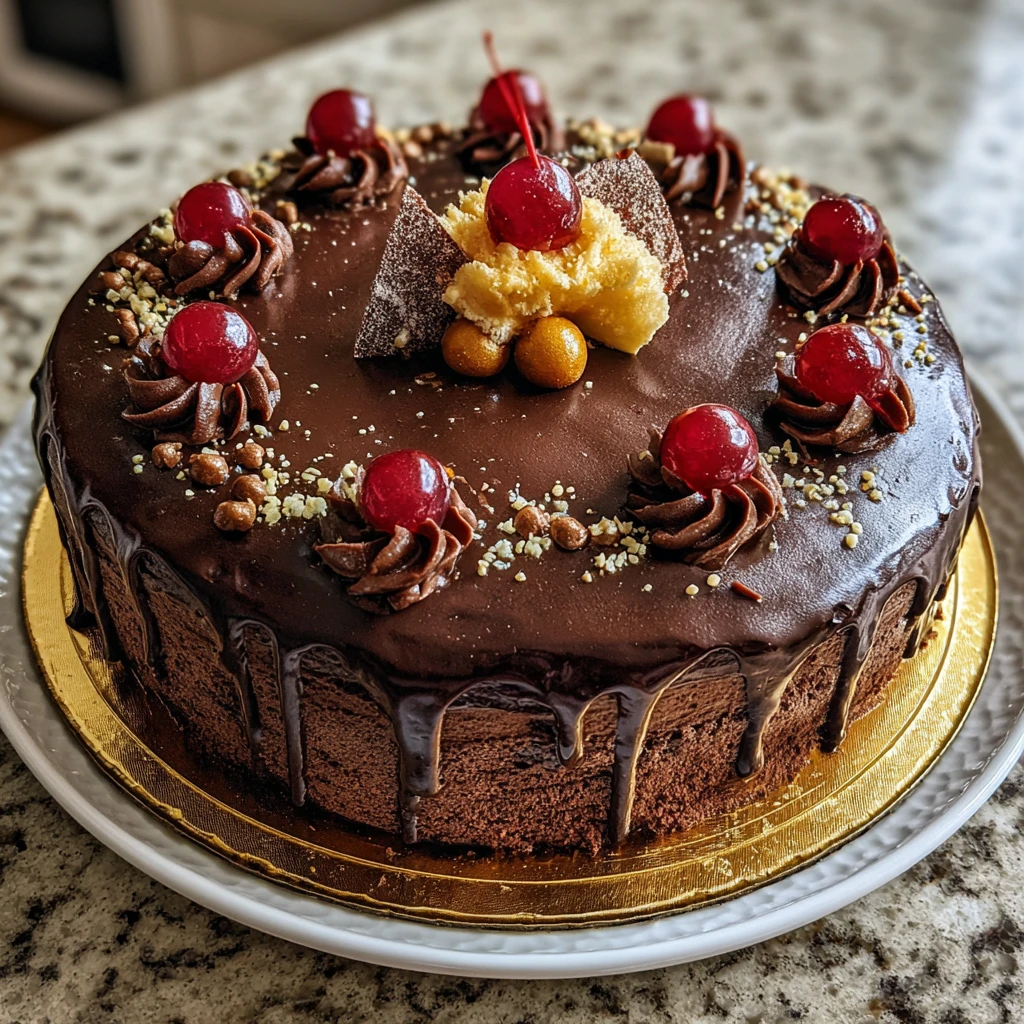
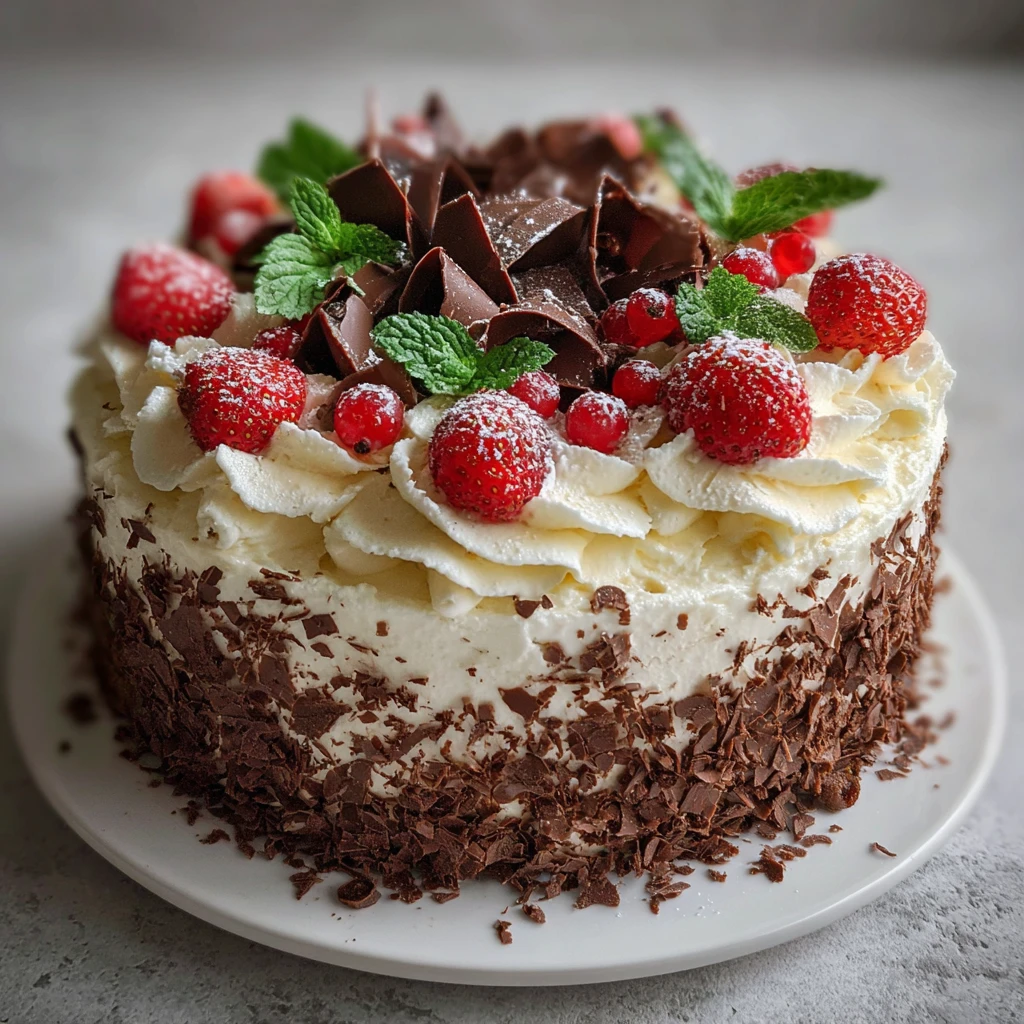
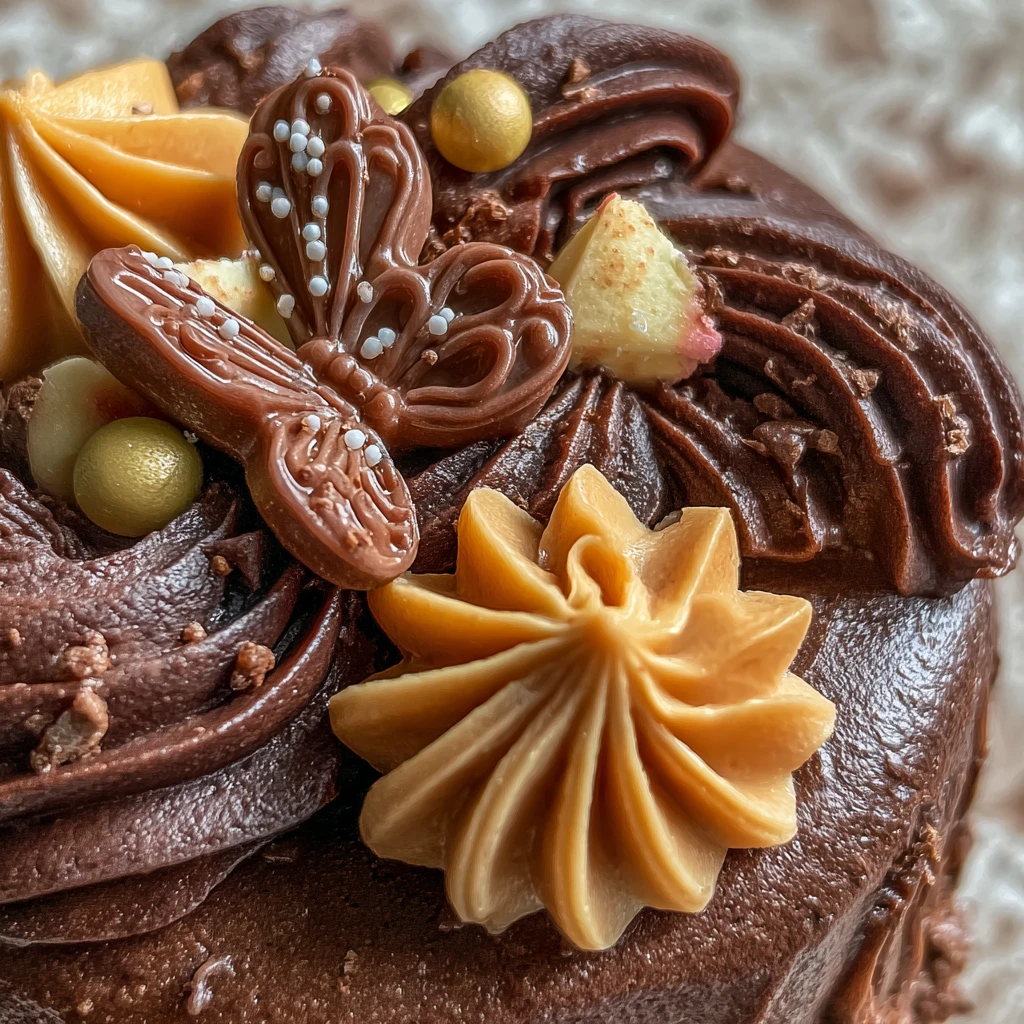
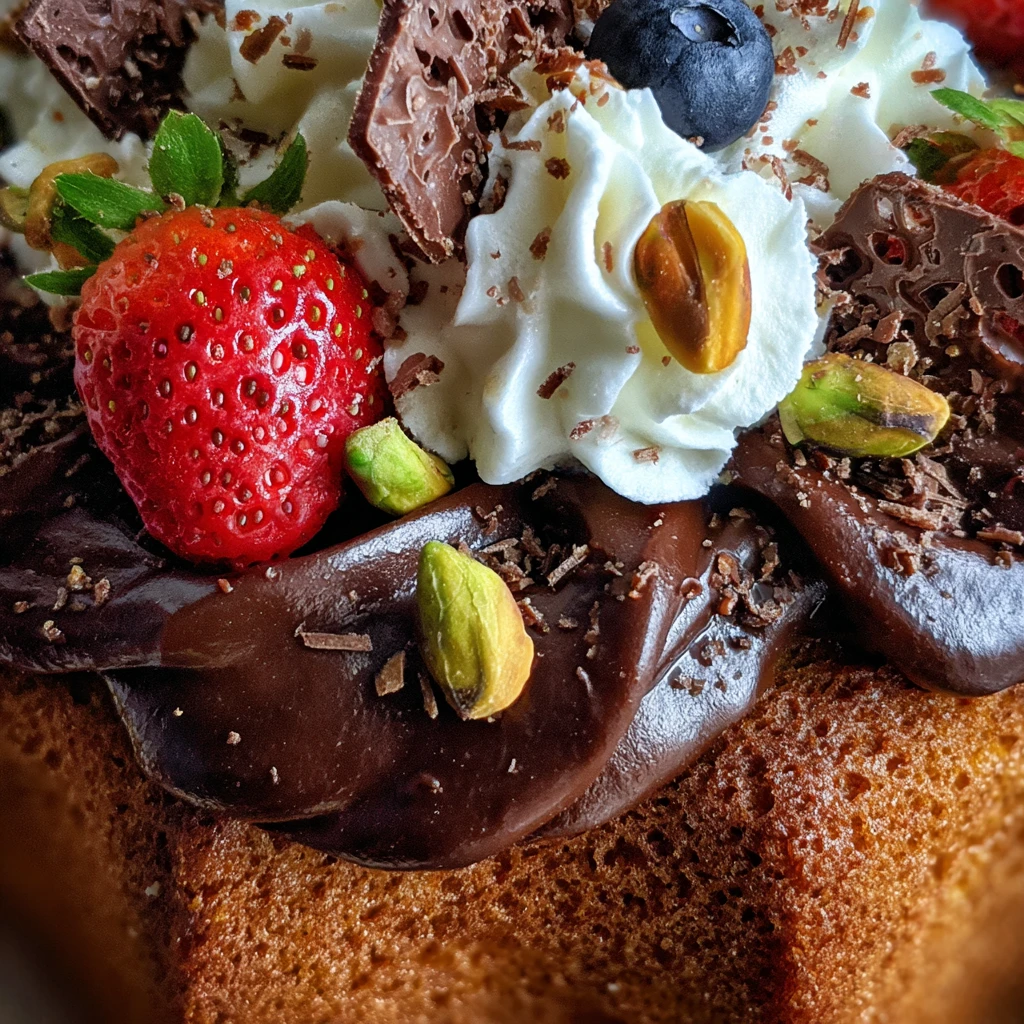
Then, the fun part: the final coat. Smooth, thick, and creamy. Pour the ganache gently, let it cascade down the sides like chocolate rivers. Sprinkle some curls or glitter, maybe add a few strawberries if you’re feeling extra.
Every time I reach this stage, I step back and smile—because no matter how it looks, it’s mine. And that’s what matters most. ❤️
Avoid These Common Cake Fails (I Learned the Hard Way)
Oh, I’ve made mistakes—plenty. The good thing? You don’t have to repeat them.
- Overmixing will ruin the fluff. Stop when it’s just smooth.
- Skipping the cooling time will melt your buttercream. Patience really is a baker’s virtue.
- Using cheap cocoa—no. Just no. Quality makes your chocolate sing.
- Uneven layering? Slice a tiny dome off the top of your cakes before stacking. Game changer.
Baking is part science, part love. If something goes wrong, laugh it off. Even an imperfect cake tastes divine when shared with people you care about.
Make It Yours: Fun Twists & Easy Swaps
That’s the beauty of homemade cake—you get to improvise!
- Vegan option: Replace eggs with flax eggs and use almond milk. Works perfectly!
- Healthier twist: Sub half the oil with unsweetened applesauce—it’s magic for moisture.
- Flavor twist: Add a spoon of espresso powder to enhance chocolate depth, or a few drops of peppermint extract for a festive version.
- Decoration swap: Try coconut flakes, gold dust, or fresh raspberries for a more elegant vibe.
My favorite version? A dark chocolate base, coffee-infused frosting, and crushed hazelnuts on top. It’s dangerously good. 😋
Chocolate Birthday Cake Decoration Your Top Questions Answered
How do I get those perfect chocolate drips?
Let your ganache cool until it’s thick but pourable. If it runs too fast, it’s too hot; if it clumps, it’s too cold. I test on the side of a bowl first—it saves a lot of panic!
Can I make it ahead of time?
Totally. Bake the cake the day before and wrap layers tightly in cling film. Frost the next day for ultimate freshness.
What if I don’t have a stand mixer?
Your hand mixer—or even a whisk and determination—will do the trick. Just beat longer and take mini breaks.
Can I freeze the cake?
Yes! Wrap it well and freeze for up to 2 months. Thaw overnight in the fridge before frosting.
How do I store leftovers?
I keep mine covered at room temp for up to 3 days. The frosting actually gets richer the next day. Avoid the fridge unless your kitchen is hot.
Can I turn this into cupcakes?
Absolutely! Bake 18–20 minutes instead. Decorate each with a swirl of frosting and a tiny chocolate heart—adorable and party-friendly.
Any secret tip for frosting success?
Work in a cool room and keep your tools clean and dry. If your frosting starts melting, pop it (and yourself!) in the fridge for 10 minutes.
Bonus tip: Always use offset spatulas—they’re inexpensive and make smoothing so satisfying.
A Few Personal Notes Before You Bake
Here’s what I’ve learned after a dozen tries:
- Bake with music playing—it makes the whole process feel joyful.
- Taste as you go. Yes, even the frosting. (It’s quality control 😉.)
- Don’t aim for perfection; aim for delight.
Decorating cakes taught me patience, creativity, and how to find calm in small rituals. A Chocolate Birthday Cake Decoration isn’t just about looks—it’s about making someone’s day sweeter.
My Sweet Closing Thought 🍰
There’s something special about baking a chocolate cake from scratch—it grounds you. From mixing the first ingredients to smoothing the last swirl of frosting, you’re not just making dessert—you’re creating a memory.
So next time someone’s birthday rolls around, skip the store-bought cakes. Make your own. Add that imperfect drizzle, your favorite toppings, and all the love you can fit in a bowl.
Because when your loved one takes that first bite, they won’t see the flaws—they’ll feel the effort, the warmth, the heart behind every crumb.
Now go ahead, tie your apron tight, turn on the oven, and let chocolate work its magic. You’ve got this. 💪
Related Recipes to Complement Your Chocolate Birthday Cake Decoration
Decadent Boston Cream Cake Recipe You’ll Love
A rich and indulgent layered dessert that cake lovers will swoon over—perfect for celebrations.
Baileys Chocolate Cheesecake Trifle
A boozy, luscious no-bake treat that brings a grown-up twist to your dessert table.
Easy Mini Chocolate Chip Muffins Recipe
Bite-sized chocolatey goodness that’s ideal for parties, brunches, or kid-friendly baking fun.
Did You Like This Recipe?
There are no reviews yet. Be the first one to write one.
Chocolate Birthday Cake Decoration
Course: DessertCuisine: AmericanDifficulty: Medium4
servings25
minutes35
minutes520
kcalIngredients
- For the Cake
1¾ cups all-purpose flour
1½ cups sugar
¾ cup unsweetened cocoa powder
2 tsp baking soda
1 tsp baking powder
½ tsp salt
2 large eggs
1 cup whole milk
½ cup vegetable oil
2 tsp vanilla extract
1 cup boiling water
- For the Frosting
1 cup unsalted butter (softened)
3½ cups powdered sugar
½ cup unsweetened cocoa powder
¼ cup heavy cream
1 tsp vanilla extract
- For Decoration
Chocolate ganache drizzle
Sprinkles or chocolate curls (optional)
Directions
- Preheat oven to 175°C (350°F). Grease and flour two 9-inch pans.
- In a bowl, mix flour, sugar, cocoa, baking soda, baking powder, and salt.
- In another bowl, beat eggs, milk, oil, and vanilla.
- Combine wet and dry ingredients until smooth.
- Stir in boiling water. Batter will be thin—don’t worry.
- Pour into pans and bake 30–35 minutes.
- Test with a toothpick; it should come out clean.
- Cool cakes completely before frosting.
- Beat butter until fluffy. Add sugar, cocoa, cream, and vanilla.
- Spread frosting on first layer, then add second and cover evenly.
- Chill for 20 minutes for a smooth finish.
- Drizzle ganache and decorate as you like.